Business Description

Berthoud wedding plannebjhjhr A little bird told me you'd like some help planning your event.....

.

.
Showing posts with label preschool parties. Show all posts

Thursday, February 14, 2013

Preschool Valentine's Day Party

{Real Parties}

My daughter is growing up to be as obsessed with parties as I am.  She was very much looking forward to her preschool's Valentine's Day party, for which my husband and I are room parents of her class, therefor, in charge of planning their party.  Now as I have mentioned in my previous post about her preschool's Halloween party, the following were the party planning stipulations:

  • No treats or snacks of any kind.
  • There is a very limited budget, my total party budget for this party for 15 kids was $45.
  • The party must be less than 40 minutes long.
  • The party must be appropriate for a variety of aged kids, ages 2-5 and at widely varying developmental levels.
Read on to find out what we planned.

The Kissing Hand
My daughter and I happened upon this adorable app for the iPad, an interactive version of Audrey Penn's The Kissing Hand.  The best part, it was FREE.  You can choose to read the story by yourself or have it read to you.  The words are highlighted if you choose the "Read to me" version.  Also, your child can tap words to hear them or objects for sound and animation.  I found the moral of the story (to not be sad when you go off to school because your mommy (or daddy,) is with you in your heart, was great to reiterate to preschoolers.  They also learned the sign language for "I love you."

Valentine Cards
Using the sign language for "I love you," I had the kids make Valentine cards for people that they loved.  I traced their hand on a peach piece of foam and cut it out.  Then I folded over their middle finger and index finger and taped them down to the middle of their hand.  The kids used stickers, crayons and rubber banded toilet paper rolls in the shapes of hearts to stamp and decorate their Valentines.

Mail Delivery and Sorting
The teacher had asked that one of the stations be having the kids deliver their boxed Valentine cards that were brought from home to each student's box.  I wanted to make this more of an open-ended activity in case kids got done with this task and then became bored.  A friend of ours was creative enough to give my daughter a handmade mail bag and little mini envelopes sewn and made from felt as a birthday gift a while ago.  I replicated her design to make a Valentine's themed mail bag, using a satchel we found on clearance at a craft store, some iron on letters and additional felt.  I designed some of the envelopes to have flaps that opened so that they could hold a real "letter" inside.  To help the kids practice their number recognition, each "letter" had a number 1-5 written on it and they were to sort the mail into the appropriate basket that held the heart with the same corresponding number of sticker hearts on it.  The mini mail boxes were found in the dollar section at Target.  So cute!  This station was by far the most popular, the kids loved the dramatic play!


Playdough Cookies
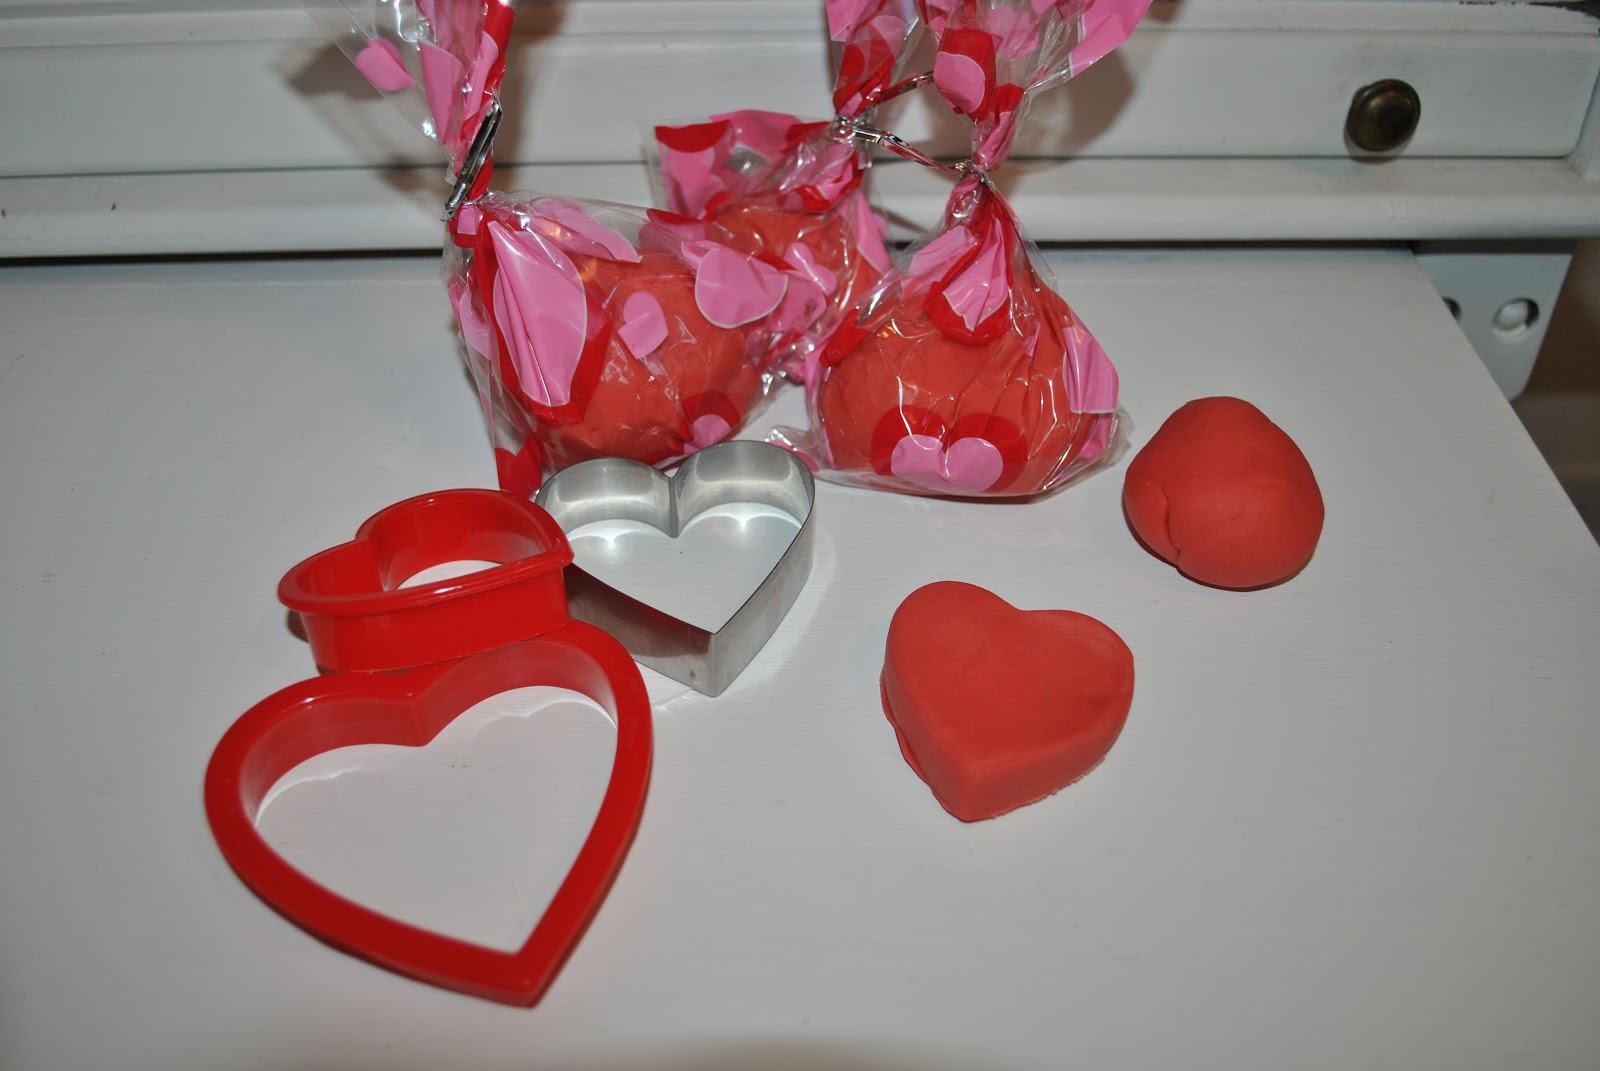
I killed two birds with one stone on this playdough making.  I'll post about the party favor for my daughter's Strawberry Shortcake party soon.  This recipe for homemade playdough is of the strawberry variety.  The recipe is below.  Each child was given their own baggie of red playdough and they rolled, cut, and flattened and used a variety of heart shaped cookie cutters to make pretend playdough "cookies."  The kids got to take their playdough home as a party favor since we wanted to discourage candy treats.  This station is where my husband politely requested to be put in charge.  Playing with playdough is fun no matter what your age!

Strawberry Playdough Recipe
Serves/Makes: 20 cups    |   Difficulty Level: 3    |   Ready In: < 30 minutes

Ingredients:
8 cups flour
8 tablespoons vegetable oil
8 packages un-sweetened strawberry Kool-Aid- this will make the playdough red, no need for food coloring
2 cups salt
16 tablespoons cream of tartar
8 cups water

Directions:
Mix flour, salt, cream of tartar and Kool-Aid in a large cooking pot. Add water and oil. Stir over medium heat 3 to 5 minutes. When mixture forms a ball in pan, remove. Knead until smooth. Store in a covered plastic container.

*Note- Since I multiplied this recipe to make so much, I divided this into two separate batches so the pot wasn't overflowing.  Also, be prepared for the mixture to be pretty sticky at first,  it needs to be kneaded until it smooths out but don't worry, it will.

Again, I had an overall budget of $3 per child.  Not too shabby huh?  I may have had as much fun planning as the kids had at the party.

Happy Valentine's Day!


Thursday, October 25, 2012

Preschool Halloween Party

{Real Parties}

My husband and I had the pleasurable task, as room parents for our daughter's preschool class, to plan their Halloween Party.  The task was fun, but a little daunting given a few of the party rules and stipulations:
  • No treats or snacks of any kind
  • You have a very limited budget, (about 1/5 of the total amount that you are able to convince parents to donate)
  • The party must be less than 40 minutes long
  • The ages and development levels of the kids in the class vary widely (ages 2-5 including kids with special needs.)
Here are the activities that we came up with:
The Chocolate Chip Ghost Story Puppet Show
I found a link to the Chocolate Chip Ghost Story and printables on Pinterest.  You can print off the story and the ghosts and furniture. Then I just taped them to popsicle sticks to make into puppets.  I have a big appliance box that I will be painting and cutting a "window" out of to turn into a puppet show theatre for the party.  We will begin the party by acting out the story and then the kids can do their own puppet shows during the party.
The premise of the story is that ghosts are only white because they drink milk and eat vanilla ice cream. One day the 5 ghosts are waiting at home for their mom to get back from the grocery store and are so hungry that they raid the fridge for snacks.  One ghost eats something green, so he turns green and hides under the bed so he doesn't get in trouble.  Another ghost eats something orange and turns orange, then hides in the closet.  Etc. etc.  The smallest ghost finds chocolate chip ice cream and turns chocolate chip.  The mother then comes home, feeds them all milk and vanilla ice cream and they all turn back to white.  
I changed the story slightly to the foods that I had play food of, instead of cutting out the printables for those.

Materials:
The kids will be making their own foam puppets with a craft kit that I bought at Michaels.  To simplify things on the helpers, I put all of each of the monster's pieces in separate baggies and attached the backings to the googley eyes already since those pieces are so small.  The kids can do their own puppet show in the big appliance box.


Rhyming Disc Game
Another borrowed idea found online. I purchased these flying disc shooter favors at Michaels.  They come with Halloween themed stickers on one side- a bat, ghost, pumpkin and monster.  I found clipart online for some other Halloween images- cat, hat, rat, mouse, "haunted" house, broom, tomb, etc.  I printed the images out and then used a round paper punch to punch out the circles and attached them to the bottom of each disc using a glue dot. (You could also purchase Round sticker labels to print on.)
To play the game and get their prize (one of the discs and shooter,) the kids must reach into a trick or treat sack, grab two discs and try to match them so that either side of one of the discs rhymes with the other disc.
When the kids or done, or if they get bored at this station, they can shoot their flying discs around the room.

Materials:
  • Flying disc shooters (the ones pictured are made by Creatology and were purchased at Michaels)
  • Computer and printer
  • White cardstock paper
  • 1 3/4" round craft punch
  • Glue dots
  • Trick or Treat sack
Witch Brew Counting
Family Fun gave me an excuse to use these cute striped paper straws, yet again.  To make Witch Brew, each child is given a paper straw and asked to suck up the paper cutouts using the straw like a vacuum, and then drop it into the cauldron.  
The kids can act as a team, or you can time each child individually to see who can complete the recipe the quickest.  My recipe calls for a total of 2 bats, 3 cats, 4 ghosts and 5 pumpkins.  (Great practice for their number recognition.) 
I knew each child would need their own individual straw to fight against sharing spit germs but wasn't sure how to label the straws.  Then I found these pencil topper tags at Hobby Lobby.  I attached one to each straw with the child's name already written on it and now, as an expansion to this game, or if they get frustrated trying to suck up the shapes, they can color their straw tag with markers.

Materials:
  • 1 Plastic bucket or cauldron (mine was from the Dollar Store)
  • Computer and printer
  • White, black and orange card stock
  • Stencil templates of ghost, cat, bat and pumpkin
  • Paper straws
  • Pencil topper tags (optional)
Treat Bucket Decorating
This station was specially requested by the teacher.  She said that her students could sit for hours decorating with stickers, and from experience crafting with my daughter, I concur.  Each child will be given their own plastic bucket as well as a baggie with a pre-sorted number and variety of stickers. (Otherwise the first group at this station will take all of the "best" stickers, of course.) The bag will also include letter stickers that spell out each child's name.  Good practice for spelling their names, minor hand eye coordination and manipulative and a great container to keep all of their party goodies!

Materials:
  • Plastic buckets (one for each child)
  • Letter stickers
  • Other assorted Halloween stickers

Creepy Crawly Toss
Use this as a simple filler game if kids get done with the other stations early.  I already had assorted buckets, bowls and baskets lying around the house.  It was easy to find some plastic creepy crawlies to purchase in bulk such as spiders, rats, bats and cockroaches.  
The "points" signs were made on PicMonkey, my favorite free photo editing site using their Halloween "Witches" theme, tool "Potion Labels."  I printed them on card stock and taped to a popsicle stick to make them easy to stand up in the baskets or tape to the top of the plastic buckets.  You can download my points signs to print out yourself below.
Older children can help add up the number of points that they get before picking out a prize.  Others will simply be excited that they get to throw spiders!
I purchased enough small toy bats, etc as well as some cheap spider rings, pencils and bouncy balls to give out as prizes and party favors.

Materials:
  • Various buckets, bowls and baskets
  • Toys to toss such as plastic bats, rats and spiders
  • Popsicle sticks
  • Tape
  • Printed points signs (download by right clicking the image below)


All together, our total purchases for this Halloween party were less than $3.50 per child. (14 children.)  


HAPPY HALLOWEEN!